In my previous post Embroidering with Shank Buttons, I talked about incorporating shank buttons into an embroidery by using seed beads to build a base for the button to rest upon. In this post, I’m going to hopefully get you thinking about different ways to make use of button holes.
You may remember my bead and button embroidery from the last post…
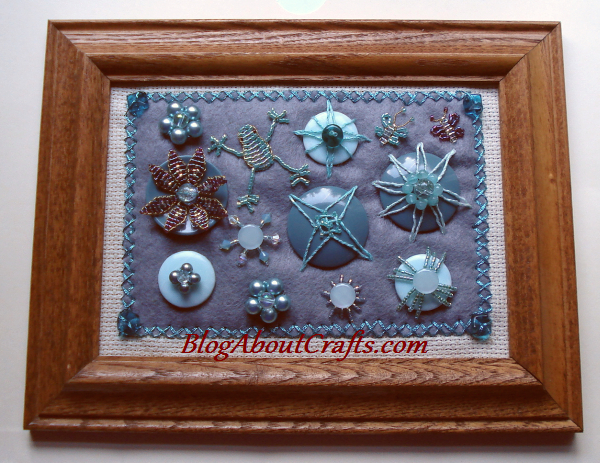
Today, I’m going to talk about the largest buttons in the piece. They were given to me by Lots of Buttons in exchange for creating a tutorial using one or more of their lovely buttons. This is actually the second tutorial to come from this project. While my last button tutorial focused on their Joi shank button, this one is going to involve working with their Palma and Tama buttons and a bit of button embroidery.
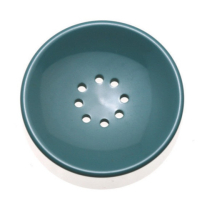
As you can see, the Palma is a lovely greenish-blue button with eight holes. What may be a little harder to see from the picture is that is is shaped a bit like a bowl.
The dome-like shape of the Palma would dictate that you could only position it on clothing in one way. However, that same domed or bowl-like shape provides a number of wonderful embroidery opportunities.
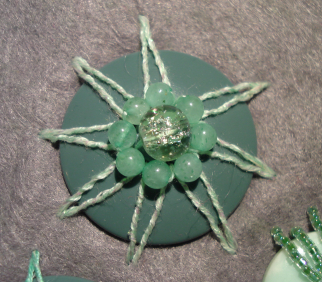 This one just might be my favorite from the entire embroidery. It uses straight stitches to attach the button to the fabric and two different types of beads to create a flower.
I started by placing the button up-side down which immediately provided some elevation.
The button is actually attached to the fabric by stitching over the face of the button rather than from hole to hole. In effect, I’m treating the button as part of the fabric and using it as a base for the embroidery.
When the embroidery was done, I thought the center was a bit plain. At that point I added the green adventurine beads. It worked out nicely that each bead fit within the points of the embroidered star or flower and that all eight of them laid flat on the face of the button.
Now with so many threads going in and out of the button’s holes, the middle of the button looked a bit messy. That was quickly fixed by the addition of the slightly larger crackle bead.
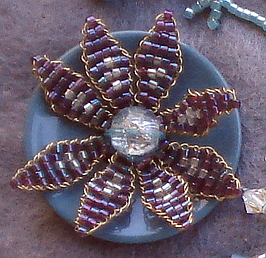 I thought the cup-like shape of the button would be perfect as a base for a flower. Since this embroidery was a Christmas present, it seemed only fitting to add a poinsettia to it. Each petal is made from wire and seed beads. The color isn’t totally accurate in this picture, but it’s the best one I took that shows the petals and how they were made.
To secure the petals to the button, I twisted the wires a bit around each other. As you can imagine, the wires added a bit of bulk to the button. To get it to lay flat, I snipped a bit of the felt away and stitched the button onto the backing fabric. (See my Felt Embroidery tutorial on The Crafty Tipster on using a backing fabric with felt applique.)
If there’s an interest, I’ll post a tutorial on making the flower petals. I’m hoping the close up photo shows enough detail for beaders to figure out the bead counts for each of the rows. (The row closest to the crackle bead has two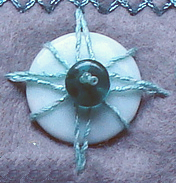 beads in it; only the tips of the petals go down to one bead.)
In a third tutorial on button embroidery, I’m going to show you a little embroidery trick to keep the embroidery strands from splitting across the face of your buttons as shown in this example using one the Lots of Buttons’ Tamas.
BTW – The buttons I received from Lots of Buttons were some of the nicest I’ve seen in a long time. There are no mold seams and both the front and backs of the buttons were pretty enough to be used facing outward. It is true that I agreed to write a tutorial in exchange for a selection of buttons. That said, there was no discussion that I would include a review or more than one post or tutorial using their buttons.