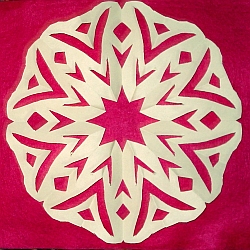
 Did you know that there is a day set aside on the calendar for snowflakes?
It’s called Cut Out Snowflakes Day. December 27th of each year has been designated as Cut Out Snowflakes Day.
Despite my exhaustive research, (5 minutes counts right?) I have been unable to find the origin of this day of recognition to this infectious childhood craft.
One site, perhaps correctly, suggested that it was designed to keep little ones busy after the excitement of Christmas and before school resumed.
In case you may have forgotten how to make these little wonders, I thought I would offer a quick tutorial on making cut out snowflakes.
How to Cut Out Snowflakes
I generally use a sheet of standard copy paper but any type of paper will work. The only thing to be mindful of is that if the paper is too thick, it will be very difficult to keep folded and cut cleanly.
|
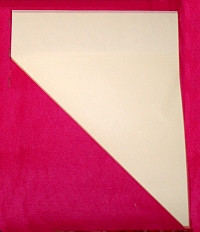
The paper needs to be squared off. I’ve found the easiest way to do that is by folding up one of the long sides, like the picture to the left.
Please accept my apologies for the picture quality but you should be able to get the idea. Make sure you line up all the edges and crease the fold well. Don’t worry about cutting off the extra yet, we’ll get to that in a bit. |
|
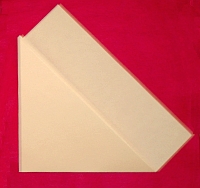
Fold the bottom corner up to the edge of the top of the previous fold like shown in the picture.
Be as precise as possible to ensure your points match. Use a pencil or other hard, flat item to crease your folds well. |
|
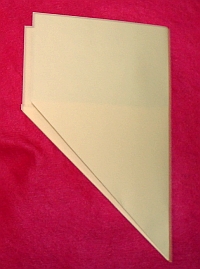
Fold the paper in half like shown.
Notice the little corner on the left that’s sticking out from the edge? You don’t want that, try to keep all of the edges even and crisp otherwise your symmetry will be off when you start cutting and you might accidentally cut off too much of the fold. |
|
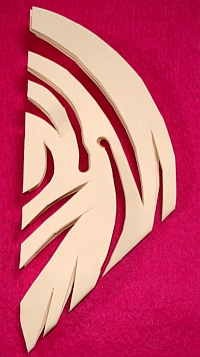
Begin cutting by making sure you cut off the top of the paper that wasn’t part of your original fold.
To me, the prettiest cut out snowflakes are made when as much of the interior section is removed. The trick is to do that while maintaining at least some of the side folds. What I love about cut out snowflakes is that while they often and up with four lobes, it’s virtually impossible to make cut out snowflakes that look exactly alike. |
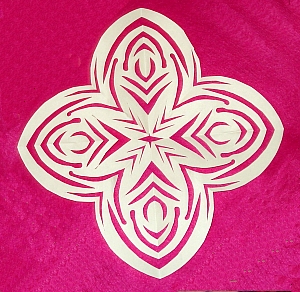
| Unfold your paper and reveal your cut out snowflake.
If your hands are strong and your scissors is sharp and cuts to the tip, you might want to make one more fold before cutting. It will make an eight-tipped snowflake like the one that begins this post. Unfortunately, if you could see it in person, you would notice that my scissors wasn’t quite up to the job. |
|
Things to Do with Cut Out Snowflakes
 Unfortunately, we didn’t take a picture of it but one year we made several dozen cut out snowflakes and hung them from the ceiling of our front foyer. It made the little room look magical. It represented a lot of trips up and down the ladder but the effect was worth it. You might want to try it next year. The kids would have a ball making them and helping Mom decorate.
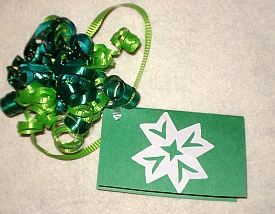
I couldn’t find gift tags that met my needs this year, so I ended up making my own. A little paper and a few snips and some glue and tadah – homemade gift tags.
The curled-ribbon bow looked much nicer on a wrapped package. Did you know they’re getting a dollar or more for curled ribbon bows? Within our family, I’m the curled ribbon bow master. They are a bit time-consuming but for the price of a few rolls of curling ribbon (buy the big spools like they use with balloons) and add in some foiled ribbon for sparkle to get the same look for a whole lot less.
So, go grab some paper, your trusty scissors and make yourself some cut out snowflakes because today is Cut Out Snowflake Day!